
Tested version - v18.1.0.651
Price - 30-day trial, $199.00 for full version
Systems - Windows 7/8.1/10, Mac OS X 10.10
Official website - https://www.painterartist.com/en/product/painter/
Raster or Vector - Raster with some editable vector tools
Ease Of Use - Simple to start a new image, select a brush and start smearing paint around. Setting up a comfortable layout, brushes, and other necessities takes a bit more effort.
In the Help menu are various options for help, video tutorials, etc that open in your web browser. Online there is the official help manual, tutorial section, YouTube video channel, and more. However, links to various related forums/communities/etc lead to outdated and seemingly abandoned sites.
All software is subjective to hardware installed, so with that in mind here is my current workhorse PC (A updated HP Z200 Workstation) specs I used for testing with all updated drivers...
CPU - Intel Core i5 CPU 660 @ 3.33GHz (2 Cores, 4 Threads)
Memory - 12 GB DDR3 total
Graphics - EVGA NVIDIA GeForce GTX 750 Ti SC (Superclocked GM107) 1 GB (DDR5 memory)
Space - 2.5 TB hard drive disk space
System - Windows 8.1 Pro
Program Speed - Quick and fluid for most tasks. Even at tabloid sized work (11" x 17") at 600 ppi smaller brushes are lag-free; although, using large brushes, thick paint, or the paint bucket (the bucket can be nearly instant to about 5 seconds depending on fill size) all have lag.
Noticeable Lag - Besides those mentioned, when working at large sizes/resolutions the zoom and rotate options lag to the point it is best to avoid them when possible. The Text tool has much lag (perhaps due to the amount of my installed fonts) and caused Painter to crash too.


In the New image window options (first image above) include Name, Preset (with 4 presets, or create your own), Size, Resolution, Canvas color, and Paper texture. The image color is strictly RGB; however, options are available for conversion to CMYK (image 2 above) when saving, that is in the main menu Canvas -> Color management settings.
There are no crop /margin /bleed /etc options, but does offer a Canvas ruler with guides, so you can set those for reference.
File Formats -
- Open - RIF /RIFF (Corel Painter), TIF /TIFF (TIFF), PSD (Photoshop Document), BMP (Windows Bitmap), PCX (PC Paintbrush), TGA (Targa), GIF, JPG /JPEG (JPEG), PNG, FRM (Painter Framestack), MOV (QuickTime moves), AVI (Windows AVI)
- Save - RIF /RIFF (Corel Painter), PSD (Photoshop Document), TIF /TIFF (TIFF), PNG, JPG /JPEG (JPEG), GIF, TGA (Targa), BMP (Windows Bitmap), PCX (PC Paintbrush), EPS /EPSF (PostScript) Export - AI (Adobe Illustrator)
Plug-in Support - Unclear. Older versions such as Painter 2015, had a support issue on a plug-in so apparently that version did. Finding anything for Painter 2018 specifically online about plug-ins only shows spam websites and nothing from Corel.

Various floating windows can be switched on and off, and are combinable in some cases (but return to default settings if altered with menu commands on/off or layouts changed). Most do not dock in Painter and simply float in the way - the tool area can not dock, so the very few windows that can are pointless (hidden behind the tool area).
The best trick is to double-click the window's individual tabs to hide their options to take up less screen space when not in use.

Basic options include 22 Composite methods (blending modes), Composite depth, Preserve transparency, Pick up underlying color, Opacity slider and numerical input, Visibility, Layer commands (Group /Ungroup /Collapse layers), Dynamic plugins (Bevel /Burn /Equalize /etc), New layer (4 types), New layer mask, Lock layer, and delete.
Clicking the sub-menu options (as seen above) opens all the options.


The options are the color wheel (changeable from RGB to HSV) and sliders with numerical input. Double-clicking the Main or Additional color (foreground or background color) brings-up the built-in Windows color selector (2nd image above) which I have thought was removed by Microsoft years ago... Anyway, the only added option here is using a color bar window instead of a wheel.

The last tab option Color set libraries shows a loaded swatch/palette. There are four included by default, but you can create your own or import them as well.


Clicking a corner arrow of Size, Opacity, or Paper texture opens a list of further options.


Common Necessities - Other tools that are primarily tools, and is surprising lacking in some software making it necessary to include them briefly.
Paint Fill - The Paint bucket works surprisingly well and has basic options, including the ability to fill with Color /Texture /Gradient /Source image /Weave.
Eraser - The options are Free or straight, Soft and Hard mode, Size amount, and Opacity amount.
Image Zoom - Onscreen buttons in the Navigator, menu controls (Zoom to fit and Actual size under Window), and shortcut controls. It includes zoom in/out on the mouse scroll wheel, but does not do 100% so you have to use another method. Zoom range 1% to 1600%.
View Rotate - Yes a Rotate tool (E) (or in the Zoom tool as well) and Onscreen buttons in the Navigator. The art can be rotated to any degree, or entered manually.
Selection Tools - Rectangle, Ellipse, Lasso, Polygonal, Magic wand, and Section adjuster. All have various options depending on the tool.

Opening the Text window (main menu Window -> Text) offers more options. Tracking and Leading options however apply to all the text not just selected text, making it worthless for most fonts - I guess it would be useful for making meme text images... Kerning is absent from the options, but would be pointless anyway in that limited usage.
The available fonts from the list appear to be limited to TrueType fonts only as well (OpenType formats I have are missing from the list). Other options such as styles (Bold, Italic, etc) are completely missing too, rendering the limited fonts to their regular typeface only (no matter the amount of fonts in the family).


Symmetry tools including Mirror painting and Kaleidoscope (4th image) help speed-up the process and accuracy of symmetric work. Rounding out the aids are a Page ruler with guides, and a adjustable Grid.

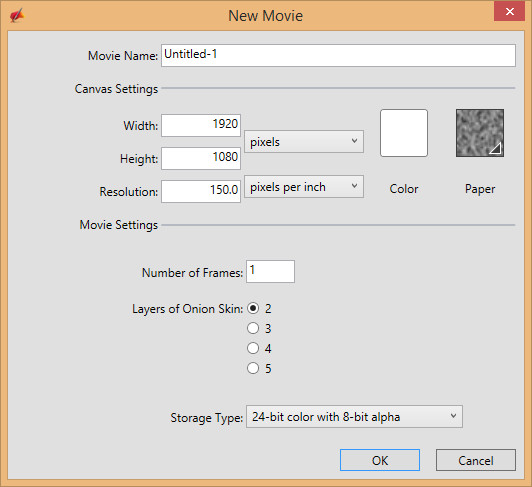
There is also a option to create a New movie animation (2nd image), animation options with onion skin setup.
Pros -
- No monthly/yearly subscription cost.
- Absolutely huge amount of brush settings for many various options.
- Videos, tutorials, brushes and more to create Bob Ross (The Joy of Painting) style work which I find refreshing - even if my university professors would highly disagree. 😁
- Lives up to it's name, and a great program to simulate traditional mediums and more.
- Over 3000 preset brushes in the Brush Library included by default!
- The composition tools help make getting started easier, and a real fundamental tool stressed in many painting classes (but overlooked in other painting software).
- Drawing aids such as Perspective guides and Symmetry tools are helpful.
- Floating windows galore hiding artwork below - with the only option of turning them on/off as needed.
- Occasional crashes (from Text tool and Scripts for me) so stability can be a issue.
- The Text tool/fonts appears to be a afterthought, especially when targeting manga/comics. The font options work only on all text (no individual character/word/line settings), no font styles besides regular type are supported (so no Bold /Italic /etc), and most of my fonts are missing in the list and appears to only support TrueType fonts.


0 comments:
Post a Comment