
Tested version - v1.6.4.104
Price - 15-day trial, $49.99 to purchase
Notes - Their new replacement for DrawPlus, and is a amazing upgrade
Systems - Windows 7/8.1/10, Mac OS X 10.7.5 (Mac Store)
Official website - https://affinity.serif.com/en-us/designer/
Raster or Vector - Both Vector and Raster. Two layouts, Draw Persona (vector) and Pixel Persona (raster), with seamless switching.
* Due to the fact Affinity Designer is basically two programs in one, many portions of this review will have two parts to equally cover both of their various aspects. To help keep it simple I will refer to Draw Persona (the Vector portion) as Vector and Pixel Persona (the Raster one) as Raster.
Ease Of Use - Reasonably easy to get started, and uses many Photoshop shortcuts. The program has a great built-in help file. Online help is video tutorials (also some on YouTube), and a forum that is for all Serif Affinity branded software. Searching online will turn-up many other tutorials, brushes, and more.
All software is subjective to hardware installed, so with that in mind here is my current workhorse PC (A updated HP Z200 Workstation) specs I used for testing with all updated drivers...
CPU - Intel Core i5 CPU 660 @ 3.33GHz (2 Cores, 4 Threads)
Memory - 12 GB DDR3 total
Graphics - EVGA NVIDIA GeForce GTX 750 Ti SC (Superclocked GM107) 1 GB (DDR5 memory)
Space - 2.5 TB hard drive disk space
System - Windows 8.1 Pro
Program Speed - Overall very quick and responsive, and one of the better programs I've tested - especially with the Raster Fill tool's speed on large files.
Noticeable Lag - With Vector tabloid size (11" x 17" and at 600 dpi) canvas it is virtually lag free even with the Brushes paint textured presets set at maximum size (1024 px).
Raster however starts to lag on the basic Solid and Soft brushes around 600 px in size. Using the textured brushes that vary on presets, lag begins at 100 - 200 px (depending on the brush).
The Flood fill tool varies on time to fill an area. To fill a 11" x 17" at 600 dpi sized blank layer takes about 5 seconds. Filling various real world examples takes less than 1 to 3 seconds. The worst was clicking the large page filling brush strokes I tested previous with alternating colors for different brushes. With a 60% tolerance, it took a bit over 30 seconds to finish. It showed me however even at high dpi and looking like it crashed/froze it finished it's task and resumed as normal - I can't say that about a lot of other programs that would have crashed/froze on the spot.
* Of course working at the more typical 300 dpi range it was much quicker, and of course even more so with smaller image sizes (canvas). I mention the lag above at the higher settings because unlike many programs that would crash, Affinity Designer responds great.


Options includes Type (Print /Print (Press Ready) /Photo /Web /Devices), Preset size, Color Format (RGB 8 - 16- 32 (HDR) /Gray 8 - 16 /CMYK 8 /LAB 16), Color Profile (and many presets), Size, Resolution (dpi), and Margins.
Page bleed can also be set from the menu File -> Document Setup (after a image is created/loaded) - 2nd image. Additional margins can be set very precisely for added options as well, I am covering below in the Drawing Aids/Extras section.
File Formats -
- Open - AFDESIGN /AFPHOTO (Affinity), PDF /AI /PSD /PSB / SVG /EPS /PS /FH11 /FH10 (Document files), EMF /WMF (Metafiles), ORF /NEF /MRW /THM /CRW /CR2 /RAF /DNG /DCR /KDC /PEF /RAW /MOS /SRF /SR2 /ARW /SRW /NRW /RW2 (Camera RAW - see full-list), JPG /JPEG (JPEG), JPEGXR /JXR /WDP /HDP (JPEG-XR), J2K /JP2 (JPEG 2000), PNG, TIFF /TIF (TIFF), GIF, WEBP (WebP), TGA (TarGA), LFP, BMP (Windows Bitmap), EXR, HDR
- Save - AFDESIGN (Affinity) Export - PNG, JPG (JPEG), GIF, PSD (Photoshop Document), PDF (Portable Document Format), SVG (Scalable vector graphic), WMF (Windows Metafile), EPS (Encapsulated PostScript), EXR, HDR


Notice however that any shortcuts created in Vector or Raster mode does not work in the other mode, and will have to be done there as well. Same for the Toolbar or any other customization done. A option to apply to both modes would be a great touch.


Double-clicking a layer (anywhere) allows renaming the layer. A right-click brings up the menu in image 1. There are many more layer options tucked away in the main menu Layer (image 2).
* In Raster mode, the Layer main menu has the various Text options removed - otherwise, the other options appear the same.


Swatches - 2nd image, offers a drop-down list of Default /Imported swatches, Recent colors, Eyedropper, and more. New swatches can be created, imported or exported too. If a palette color is double-clicked a color editor for it opens, 3rd image.

* The only difference between Vector and Raster color selection is the stroke icon is replaced with a solid background color icon (a ring to a circle).


The Stroke window I included in the screenshot as the option Style shows that it is set to the brush (Textured Line Style) - which I assume can be used custom effect for other vector aspects. None of the options in Stroke affect a Brush however.
The Brush window has a list of categories, and brush presets. New brushes can also be added, or imported/exported as well. Double-clicking a brush opens the Brush Editing window with several options (3rd image).


The Brush Editing window has a list of categories, and brush presets. New brushes can also be added, or imported/exported as well. Double-clicking a brush opens the Brush Editing window with many options (3rd image) including three tabs to hold them all.
Common Necessities - Other tools that are primarily tools, and is surprising lacking in some software making it necessary to include them briefly.
Vector -
Fill Tool - Only adjusts a line/objects fill color. If you have open node shapes this is of little to no use. Unlike the previous DrawPlus software (or most other vector software), there is no Flood tool to truly fill an entire area. For real filling in Affinity your only option is to switch to Raster mode and use the Flood fill tool there (but is of course not vector).
Eraser - None, again a Raster mode only tool - unlike their discontinued DrawPlus software (or most other vector software).
Image Zoom - Onscreen buttons in Navigator, shortcut controls, menu controls, Zoom to fit, Zoom to selection, etc. It includes zoom in/out on the mouse scroll wheel while holding CTRL. Zoom range 0% to 1000000000% (although after 209715222% for me moves the view placement).
View Rotate - Menu controls, and can only rotate at 15 degrees - making it less than ideal. Rotate keyboards shortcuts can be added for ease, and one of the first things I did as there are no onscreen buttons for this (and can not be added in the Customize Toolbar either).
Selection Tools - Move tool to select entire objects, or Node tool to adjust individual object nodes.
Raster -
Flood Fill - Only two options Tolerance amount, and Contiguous (on/off). While it works good with outlines to hide gaps, if your art does not use outlines (line art) then manual touch-up will always be needed.
Eraser - Width, Opacity, Flow, Hardness, More (Brush selection window), Force pressure to control size, and Stabilizer (None /Rope /Window /Rope-Window Length).
Image Zoom - Onscreen buttons in Navigator, shortcut controls, menu controls, Zoom to fit, Zoom to selection, etc. It includes zoom in/out on the mouse scroll wheel while holding CTRL. Zoom range 0% to 1000000000% (although after 209715222% for me moves the view placement).
View Rotate - Menu controls, and can only rotate at 15 degrees - making it less than ideal. Rotate keyboards shortcuts can be added for ease, and one of the first things I did as there are no onscreen buttons for this (and can not be added in the Customize Toolbar either).
Selection Tools - Rectangle marquee, Elliptical marquee, Row marquee, Column marquee, Free hand selection (lasso), and Selection Brush Tool (that is a manual Magic wand mix).

The default view shows a Font selector (with lists of Recent /Used /Favorites), Size, true Styles (Bold, Italic, etc only what is in the font family), quick Style selectors (with faux Underline), Character style (No Style /Emphasis /Strong /Strong Emphasis), Paragraph style (No Style /Body /Heading 1 /Heading 2), Align (Left /Center /Right), Justify (Left /Center /Right /All), Paragraph leading, Character window open, Paragraph window open, and Fill color.
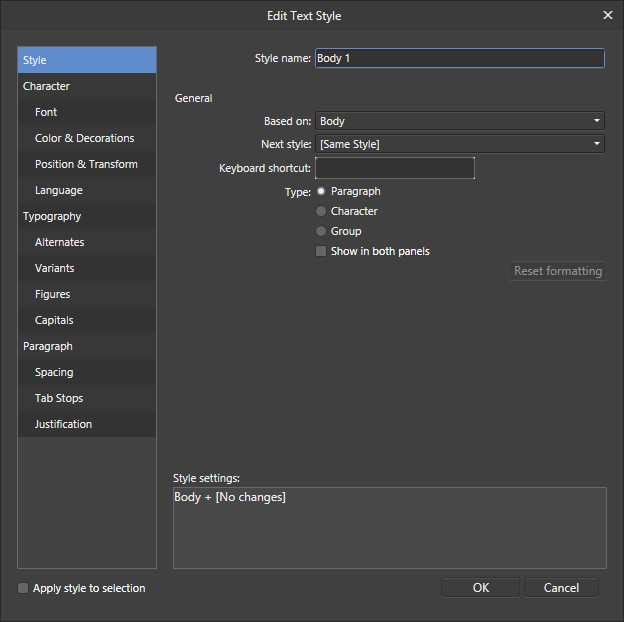
The Character window offers all the typical advanced text/font options that are expected in any vector program Kerning, Leading, Tracking, Ligatures, and much more. The Paragraph window options cover Line indent, Tab stops, Justification overrides, and much more. A Glyph Browser with a proper preview, making it easier to enter (and find) extended characters from fonts.The Text Styles window allows for quick switches of preset styles, and creating custom styles (2nd image) for Paragraphs, Characters, and Groups (along the bottom left).
* I hope the program author(s) expand the text font favorites to include presets (for lists of fonts for example in comics - dialog, sound effects, design/cover, etc).
Obviously it doesn't make the text tool any worse without it; however, it would help in switching/finding the fonts. As favorites for me could easily be many hundreds depending on the work/style fonts I mark favorites. 😊


Pros -
- No monthly subscription costs
- Docked or floating tools/windows (you choose), that are independently configured for vector and raster (Draw Persona and Pixel Persona).
- Nearly no program lag with mouse or tablet.
- Stable program that can actually load maximum canvas sizes, and completes long functions without freezing or crashing.
- Amazing text/font tool options that work great and cover seemingly everything.
- Font list updates while the program is still open/running, if fonts are added/removed in Windows.
- The Guides (guidelines) is great for setting up page options, and the position shown (and Guides window) - make using guides a breeze. Too bad other programs are not so refined.
- No scripting, macro, or action types of support - which depending on workflow/projects is a necessity.
- Limited Toolbar icons/functions that can be added - definitely not all the menu items.
- No Mesh too or Gradient tool that are often used in advanced vector graphic design/illustration work.
- No plug-in support.
- Flood Fill and Eraser tools are only in Pixel Persona, which means if your working in vector it will limit your work.
- Lack of drawing tools/aids in either vector or raster mode beyond shape tools. Yes, Vector nodes can easily be adjusted, but makes tasks more complicated than necessary. In Raster mode your simply on your own.
* While the whole Draw Persona (vector) and Pixel Persona (raster) in a single program concept is awesome, it just lacks several options. For example vector tools such as Flood Fill, Eraser, Mesh tool, Gradient tool, and others are missing.
Depending on your workflow, typically used tools, and project needs using two individual programs that are exclusively vector and raster on the same image (or to use the tools missing) will be needed. So sadly it is not a one-stop program for all projects - depending on your work.
As Affinity Designer is still relatively new hopefully such tools and more will be added in the future.
Personally I will be purchasing the software for many of my projects, and will be great for adding final work on many others. I simply find it head and shoulders above most other software even with it's limitations.


0 comments:
Post a Comment